I've had the basic idea for the X1 in mind for more than 30 years.
I first modeled the car in plaster, because I had found through an absurd amount of trial and error (mostly error) that the shapes I had in mind were just more complex than I knew how to draw. I also wanted to be able to put a shiny finish on it, and I knew from a little exposure to car design decades earlier that at least in the past, the pros used plaster for this stage of the process.
I did the initial modeling on the deck behind my home, using a bucket, a hose, a stick to goosh the plaster and water together in the bucket, and some sort of metal (possibly cut-up strips from an old coffee can) shaped into roughly oval forms to pour the four wheel pods. When the plaster started to dry and get a little firmer, I was able to form some of it by hand into a roughly football-like shape. Then when that was dry, I put the wheel pods in place, glopped on some more plaster to essentially glue them to the central pod, and filled in some more plaster to tie the wheel pods togther fore and aft.
Voila! I could see that the idea had potential, but I didn't know what else to do with it. I also had kids to raise. The rough mockup lived in various garage nooks and closets for nearly 20 years.
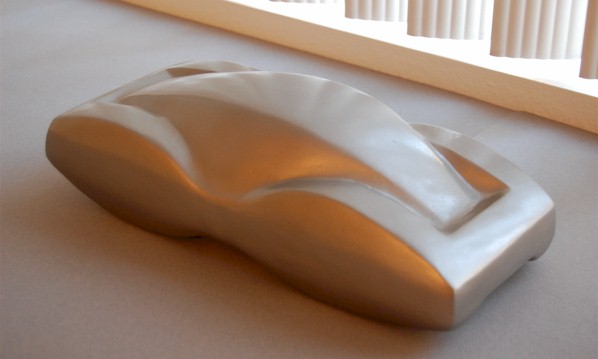
When I eventually found some time to move forward with the mockup, it didn't look much like what you see above--in fact, it was about as crude and lumpy a shape as you can imagine. After a preposterous amount of time spent carving and filling and sanding and refinishing, I remarked that it was finally beginning not to look like something that had been sculpted out of oatmeal. Someone immediately dubbed the car the Oatmobile, and that's how my family has referred to it ever since.
I coated it uniformly in a neutral metallic paint because it was still just an idea for a shape at this point, and I didn't want to distract from that with a lot of details that I still needed to think through. (Also, I had seen some great examples of general shape-modeling as a teenager visiting the GM Futurama at the New York World's Fair, and I hoped to create something like them.)
My intended next step was to make a mold and create a copy of the shape, then carve out wheel wells on the copy and begin to add more detail.
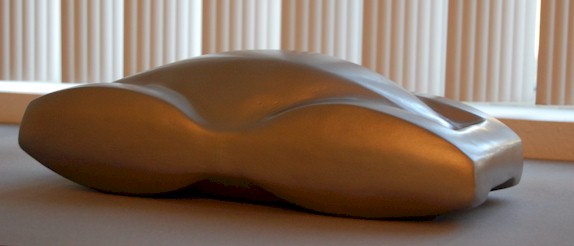
I got only as far as buying some wheels and putting them against the side of the car before I realized that some signficant changes had to be made. The lower portions of the wheel pods already protruded in a way that made the car appear to float above the surface it was resting on. To raise the car up further than this for ground clearance, with the wheels sticking out beneath the body, would have made the car look like it was standing on its tippytoes.
The dramatic vertical dips between the upper portions of the wheel pods were also problematic. If the side glass of the passenger compartment were to extend that far down, it would be impossible to roll down the windows. (There wouldn't be enough door beneath for the glass to roll down into, and the windows would also have to bend--not something that glass likes to do.) But if the glass didn't extend down this far, there wasn't a natural place to separate the upper "greenhouse" from the lower bodywork. Worse, to attempt to do this would undermine a fundamental aspect of the design's appeal--the way central pod nestles down among the wheel pods.
I realized I needed to tone down the vertical dips and jumps of the wheel pods. I bought some sculptural foam (Hollywood set designers use this for their models--much easier to work with than plaster) and I came up with the shape shown below.

The result was a more practical design, but at a definite cost in visual drama. My first ideas for the tail lights and general rear end treatment were also a bit dull, vaguely resembling something on a 1980s Mercedes.
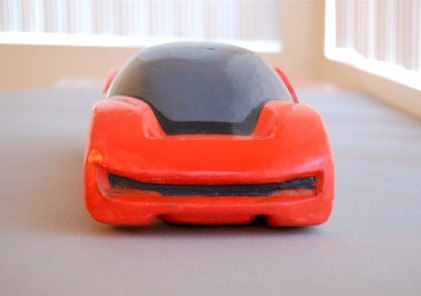
As for the front, the squared-off shape that had seemed elegantly and dramatically simple on my first mockup now just looked clunky and unfinished. I tried making diagonal cuts at the corners, but I didn't realize how, because of the downward slope of the fenders, this would result in a shape that rose up at its corners. The result was what you see below--basically reminiscent of a late-1960s Camaro, only now having entered its dotage with a demented, toothless grin.
In my next attempt, I was able to establish more of a sense
of flow
between the wheel pod shapes, and compensated for their reduced
vertical prominence with more deeply and fluidly sculpted sides.
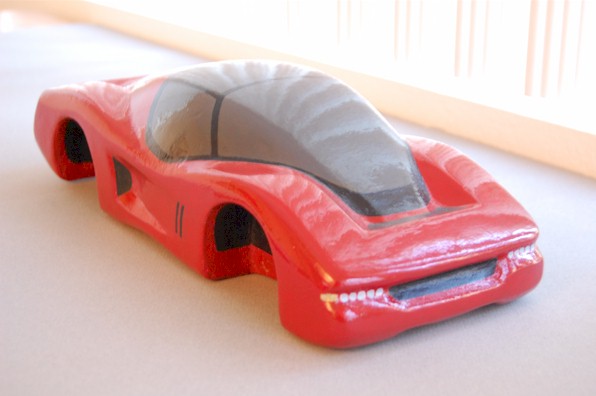
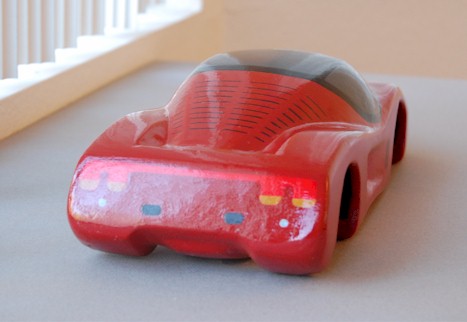
I jettisoned the 1960s-style hidden-headlight grille for something making use of LED lights, and tried to emulate some of the feel of the front-end approach of recently released Honda Civics, whose design I found very fresh and pleasing. The "face" I came up with, though, seemed a bit more reminiscent of the helmets on imperial stormtroopers in the Star Wars movies (especially so when the car was white).
I deliberately kept the rear end treatement simple, but on balance I found it too simple. It was also too low, giving the car a kind of droopy-drawers apearance when the wheels were mounted. In addition, it failed to convey much of a sense of fore-and-aft motion.
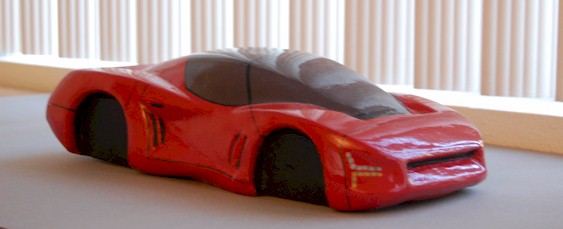
My next attempt gave the rear end a bit more heft, and created more of a sense of thrust emanating from the car's "haunches." I also did quite a bit more with the sculpting of the sides.
I created this mockup from clay, so that I could start with the central body pod and add the wheel pods. This enabled me to better explore the shapes and their possibilities.

The new design had more of a sense of fore-and-aft movement. I also came up with a way to taper the "nose cowl" inward from the sides so that I could arrange the LED lights in a way that,to my eye, simultaneously evoked (a) the running lights that some independent truckers adorn the wheel wells of their rigs with, and (b) warpaint on the cheeks of Native Americans.
I felt I was basically getting onto the right track now. What was mainly needed at this point was to adjust various proportions to eliminate the remaining clunkiness, and to create more interest in the back of the car.
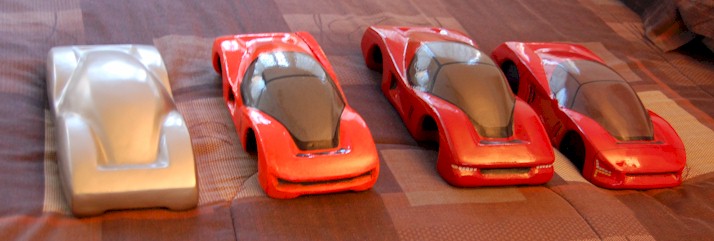
The shot below shows how the design had progressed by this point.
To see how the next iteration turned out, click on the link below: